
This is as per a few friends’ request, on how I make my scrap layouts from start to finish. This is how I make my layouts and it’s different for every people. This is just the basic and it’s up to you and your preference on how you’ll do your layouts. Hopefully this will give you a good idea. Mads & Mariel, hope this helps…
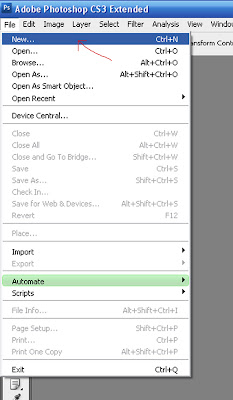
1. I open a new layout. Go to File in your top menu bar and choose New. Then a new window will pop out. Choose your settings that you wanted to use for your layout.
1. I open a new layout. Go to File in your top menu bar and choose New. Then a new window will pop out. Choose your settings that you wanted to use for your layout.
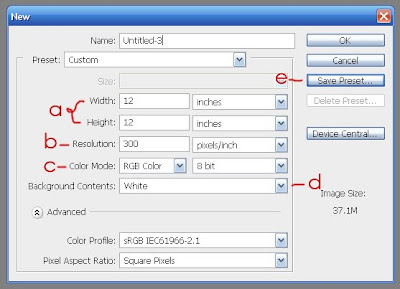
a. Set the width and the height of your paper in inches. I prefer on using 12x12 inches and then print on 8x8 inches.
b. Set the Resolution to 300 dpi to avoid getting your layout appear pixilated or blurry.
c. Set your color mode to RGB and 8 bit.
d. Select the background Content that you wanted. I usually use Transparent but lately I’ve been using White Background since the checkerboard background of the transparent is starting to become an eyesore for me.
e. You can save this preset by clicking Save Preset. So the next time you’ll start a new layout, you’ll just have to click the drop menu beside the Preset and choose your saved layout size.
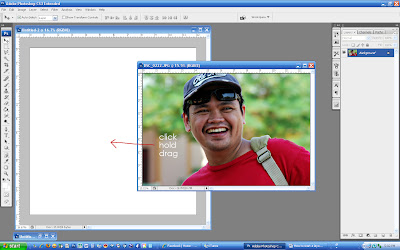
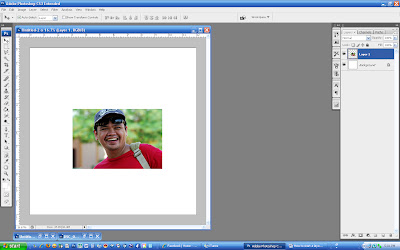
2. Now that I have a new paper to start my layout, I then opened the photo that I’d like to scrap. A new window will pop out with the photo that I have chosen. I just drag the photo over my layout.
b. Set the Resolution to 300 dpi to avoid getting your layout appear pixilated or blurry.
c. Set your color mode to RGB and 8 bit.
d. Select the background Content that you wanted. I usually use Transparent but lately I’ve been using White Background since the checkerboard background of the transparent is starting to become an eyesore for me.
e. You can save this preset by clicking Save Preset. So the next time you’ll start a new layout, you’ll just have to click the drop menu beside the Preset and choose your saved layout size.
2. Now that I have a new paper to start my layout, I then opened the photo that I’d like to scrap. A new window will pop out with the photo that I have chosen. I just drag the photo over my layout.

3. Then I chose a frame for my photo. And then arrange it according to how I liked it to appear.
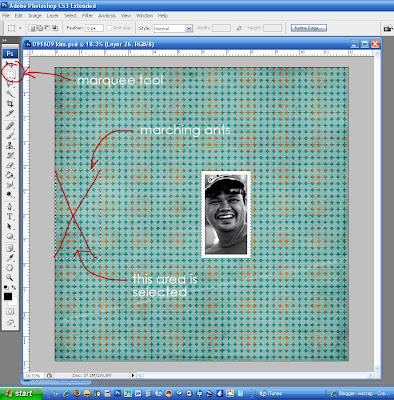
 4. Then I added elements and other papers (patterned and plain). Since I only used a little portion of the papers I just selected the part that I wanted to use and then delete the rest.
To do this, I choose the paper (make sure the layer of the paper you’re working on is active before you do anything). Then using the Rectangular Marquee Tool, I selected the area of the paper I wanted to use, a running/marching ants should be visible.
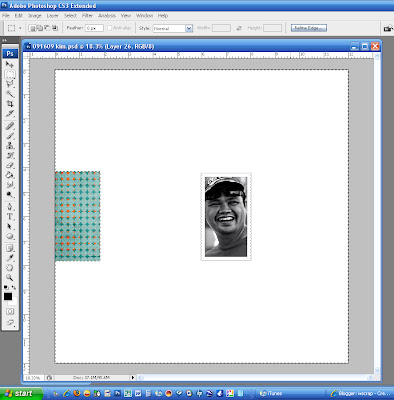
Then I right-clicked the mouse, then choose Select Inverse, then pressed Delete button. What will remain is the area that I will use.
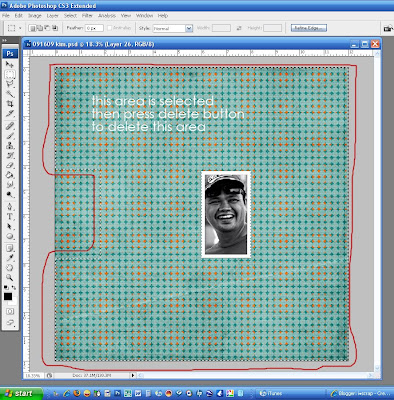
Click on the paper while still on the Marquee Tool to remove the marching ants.
 Then I applied Drop Shadow (it's all up to you if you like to put drop shadows or not). Just click the fx icon below your Layer Palette. Then scroll to Drop Shadow.
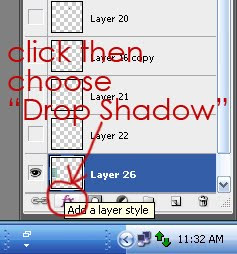
A new window will pop out, Layer Style. Check the Drop Shadow then:
a. make the Blend Mode to Multiply
b. adjust the Opacity, I make mine between 65%-75%
c. adjust the Angle and Use Global Light should be checked
d, e, f. adjust the Distance, Spread and Size of the shadow
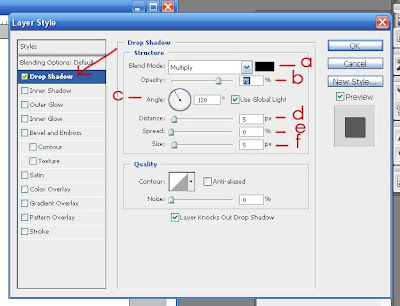 After changing/adjusting your frop shadow setting, click ok.
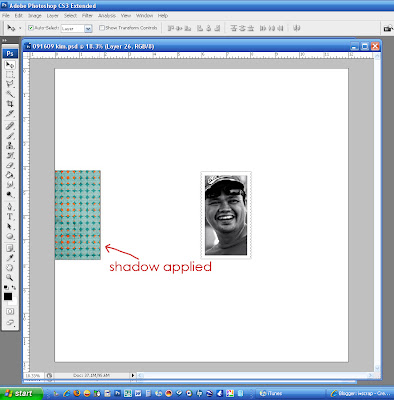 Just rearrange the elements and papers you desire to use around your paper/layout until you are satisfied with it.
  5. I added text to my layout. You can also edit your text using the Text Palette (Character and Paragraph Palettes).
  6. Then when you’re done, save it as PSD file so you can still edit it later if you like. Then save another for a large file in JPG format, make the Quality 10-12 and choose the Baseline (“Standard”) and then click save.
Note: Before starting your layout, save it right away as PSD format and once in a while keep on saving it to avoid loosing it when something wrong happened while you're scrapping.
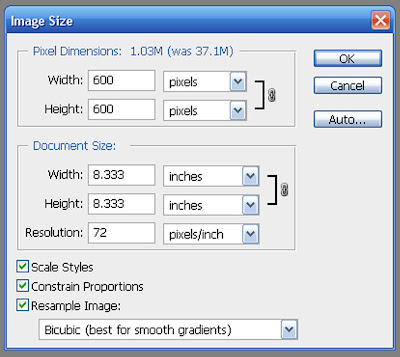
7. If you like to post this on web, save another file still in JPG format. Change first your image size. Go to Image on the top Menu bar and choose Image Size. A new window will pop out. Click the Scale Styles, Constrain Proportions and Resample Image to Bicubic (best for smooth gradients). Then change the Resolution to 72 pixels/inch. Lastly, change the width into 600 pixels and the Height will automatically proportion itself. However, I don’t usually do this last part (change the width and height).
 This is the final layout that I've made...
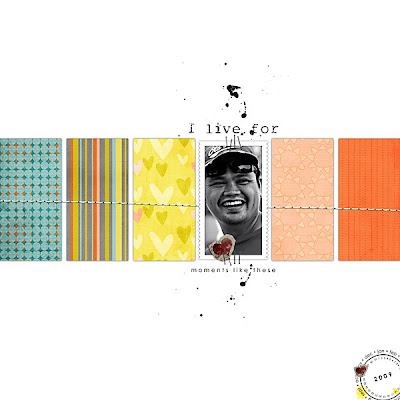
Credits:
Three Paper Peonies Whimsy Kit
Vinnie Pearce I Live For Monikit Freebie
Jolagg Lata
Gunhild Storeide Stamp Frames #3
I Scrap Date Stamp 2009
That’s it, you’re done. You already know the basics and it’s for you to explore and create. Hope this helps. On the other hand, if you still have questions regarding this thing and other tutorials, I suggest you stop by Amanda’s blog. She has so many great tutorials.

2 comments:
i think this was made for me grid.....heheheh. been scrapping without proper file sizes and format....hehehehe.kinawboy style.
hi ing! was here...whew! im gettin there..hehehe
thanks for the tips..=)
Post a Comment